Wedding or Engagement Card
Hero Arts has a monthly kit they sell which comes with a whole bunch of items. In April 2017, the kit was centered around stamps and dies resembling paper dolls from the 1950's. I purchased the kit because I didn't have any stamps like this although I was uncertain about how to use it. Recently, I was in need of a wedding card and felt that making a shaker wedding dress would be a different idea and a good use of the April stamp set.
Building the concept
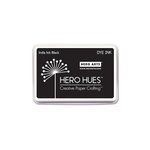
After adding distress inks to the background, I trimmed the paper to 5 1/4 x 4. I also trimmed a piece of Fun Foam to slightly smaller than my card front. On both the fun foam and front panel I die cut a dress from My Monthly Hero April 2017 kit. This kit is sold out but you could use any die dress. I cut a rectangle from a piece of stamp packaging that was slightly larger than the dress opening and adhered with scor tape to the back of my front panel. On the card front I stamped the head, arms, legs and necklace from the kit using my MISTI for placement and Hero Arts India Ink Black Dye Ink for the images. I then used Tombow markers to color in the skin, hair, and shoes of the girl. To add some shine, I used Wink of Stella Shimmer pen on her gloves, necklace and shoes. For the sentiment, I used WOW metallic silver Embossing Powder and a stamp, love, from Hero Arts Love Notes Stamp Set.
Building the shaker
Once she was colored, I added Scor Tape 1/8" double sided adhesive to the fun foam on both sides. I adhered the foam to the front panel. I like to use a sheet of fun foam instead of just foam tape because this ensures there are no lumps and bumps; just a smooth surface and the fun foam's even placement makes it harder for the shaker bits to escape. For shaker bits I added: Pretty Pink Posh clear sequins and seed beads, Queen & Co silver sequins, Martha Stewart glitter and micro beads and Hero Arts sequin and seed bead mix. For my shaker bits, I like to add different items to increase the texture and interest of the shaker. I'm not sure about the perfect ratio of shaker bits to space but I always don't add enough. So my advice is: when you think you have enough, add a bit more. I then adhered a 5 1/2 x 4 1/4 gray piece of card stock to my front panel and then put that whole piece on a top folding A2 sized card made from Neenah 110lb stock.

She is ready for her big day. I really like this card because it is fun and playful. I am going to try to see how she looks with just a white background instead of using the Distress Inks. I resisted the urge to add sequins or other embellishments because I really want the focus to be on the bride, which is where it is supposed to be on the wedding day. If you would like to try to make this card, I have added affiliate links to the supplies I used below. If you chose to use these links, I may receive a small commission at no cost to you. Thank you for supporting my blog and I hope you are having a crafty day!
Comments are closed.
|
AuthorWelcome to Seven's Crafts and thank you for stopping by. I am a mom, teacher and avid paper crafter. I hope these posts will leave you feeling inspired and ready to do some crafting. 

Archives
November 2021
Categories
All
|


 RSS Feed